Roofs protect buildings from rain, snow, sunlight, and temperature extremes. They can be constructed in various shapes and sizes for aesthetic, structural, or functional reasons. For more information, click the Visit Website to proceed.
Roofs should shed water to prevent standing water, which can damage the roof structure and some roofing materials. Water that pools on a roof can also void some manufacturer warranties.
A roof protects the interior of your home from harsh weather conditions, such as rain, snow, wind, and extreme temperatures. However, over time, your home’s defenses can wear out and allow elements into your house that cause damage or health problems. A sturdy, updated roof keeps your family safe from mold, mildew, water damage, and structural support issues that can threaten your safety.
In addition, a strong roof is more resistant to fire damage. The roofing materials can withstand high exposure to flames and prevent the spread of fire from one part of your house to another. A reputable roofing contractor can install insulation that protects against fires, extreme heat, and cold temperatures. They can also lay down tarps around shrubbery and plants in your yard to prevent damage during a reroofing project.
Surface repairs are inexpensive and simple, such as replacing a single damaged or missing shingle. A knowledgeable do-it-yourselfer may be able to do this, but if you need experience with roof repair, it’s best to call in a professional.
A skilled roofer will be able to assess the extent of the damage, determine how many new shingles are needed and where they should be placed, and properly install them. They can also repair the flashing or thin metal pieces that line roof valleys and prevent leaks around features such as chimneys and skylights.
Start by loosening the nails and adhesive on a shingle directly above the damaged one. Slip a pry bar underneath the shingle and work it upwards until you can pull up the nail about 1/4 inch from the top. Repeat this process on the shingles above and below the damaged shingle to expose and remove all of the nails on the shingle.
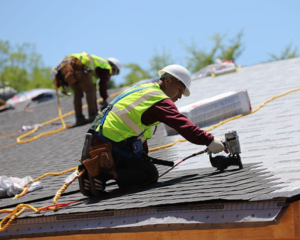
Next, slide the pry bar under the first tab of the shingle above the damaged one and work it upwards to lift that shingle. Then, use the pry bar to loosen the nails on the shingle below that, and then remove it. Once the old shingles are removed, place a new 3-tab shingle. Use a tool belt to keep all your tools within easy reach and prevent them from falling onto the roof.
After completing the above steps, it’s a good idea to inspect your roof from ground level again to ensure no more shingles are missing or damaged. It’s also a good idea to take annual photos of your roof to spot potential problems before they develop. And remember: Always tie your ladder securely and have a spotter to support it at the base when climbing on the roof.
Leaks are among the most common problems that homeowners encounter with their roofs. Unless they are promptly repaired, leaks can cause serious water damage and even lead to structural issues in your home.
To stop a leak, you first need to find it. Look for wet spots on the ceiling or walls and trace them back to their source. Then, take a flashlight and head into the attic to shine it on the underside of your roof decking or insulation. If you can see where the leak is coming from, you can repair it with roofing cement and aluminum flashing.
Most leaks occur at the roof’s seams or around penetrations like vents, chimneys, and HVAC access panels. These areas are vulnerable to moisture and can be punctured by nails, screws, or debris. It’s important to inspect and re-seal these areas regularly.
Other common leak sources include valleys, ridges, and dormers. These areas can be particularly difficult to track down since water will usually travel along beams and rafters before reaching the interior of your home.
The most obvious signs of a leaky roof are water stains on the ceiling and walls. These can be accompanied by sagging, dampness, or mold growth. A constant stream of water can also cause wood floor beams and joists to rot or warp. In addition, carpeting, wallpaper, equipment stored in the attic, and furniture that is soaked regularly can become permanently damaged.
A good roof repair professional will use a high-quality roofing membrane and flashing to prevent leaks. A membrane can be applied directly to your existing shingle or covered by a layer of new shingles and rolled over with underlayment. Sometimes, a tarp can protect the area until the roof repair is completed temporarily.
If you suspect you have a leaky roof, call a roofing contractor as soon as possible. They will have the tools (ladder, scaffolding, fall protection) to reach difficult areas of your roof and perform a thorough inspection to locate and repair the problem.
A sagging roof can indicate serious problems that could cost a lot to repair. Roofers can easily fix an isolated sag in a single spot, but if the issue is widespread, it could mean that the roof’s structure has deteriorated or that a major leak needs to be addressed.
If you notice a sagging roof, it’s time to call a pro for an inspection and a repair estimate. A roof may sag for many reasons, including poor construction, age, and weather conditions. The best roofing company can assess the situation and advise homeowners on how to proceed with a repair.
One of the most common reasons for a sagging roof is a problem with the fascia. The longboards that run along the roof’s edge and support soffits and shingles can warp or crack over time. They can also be damaged by insects or water. In some cases, a fascia replacement is needed to prevent further damage to the roof and to protect the underlying boards.
The other common cause for a sagging roof is problems with the rafters. If a roof is very old or isn’t installed properly, the decking or rafters may need to be stronger to support heavy snow loads or rainwater. Over time, this can cause a noticeable sagging in the middle of the roof or even the entire house structure.
To fix this problem, a homeowner can use ice and water barriers to help keep the soffit and main roof joints leak-free. To do this, remove the shingles and slip a strip of adhesive ice and water barrier (available where roofing products are sold) under the soffit/main roof joint. The ice and water barrier should overlap another strip beneath it to the roof edge. This barrier must be thick and durable to prevent water from leaking through the underlayment.
If water is pooling in places where it shouldn’t be, or even if it’s just a few drips, you need to address the problem as soon as possible. If left unattended, a leaky roof can cause mold, rotted framing and sheathing, destroyed insulation, and water damage to walls, floors, and ceilings.
Leaks that aren’t repaired immediately can also be a fire hazard, potentially losing life and property. An influx of water can wreak havoc on electrical wiring, too. If water contacts the wires, it can short-circuit them and leave your house without power until the problem is resolved.
If you suspect a leak, the first thing to do is to put a large container under the area where the water is dripping. This will catch the water until you can get your roof fixed. You should also tarp the area to limit the water damage to your belongings in the home, such as carpeting and furniture.
Water stains on the ceiling are another sure sign of a leak in your roof. If the stains are dark in color and have a musty smell, that’s a bad sign. Mold will eventually start growing on moist surfaces and can cause health issues in the home and reduce your home’s value.
When the shingles are removed for roof repair, removing the step flashing is a good idea if it has become damaged. This piece of metal runs along the wall where it meets the roof and is used to channel water away from the roof-wall junction. It’s often integrated with each shingle course and lapped against the wall. If it’s corroded, you must replace the step flashing and install new shingles.
When replacing the flashing, make sure you use roofing cement to ensure it is sealed properly. You should also ensure that the nails that secure the flashing are not exposed. If they are, apply a layer of caulking around the nail heads to seal them as well. Nails that aren’t properly secured can puncture the new roof materials and allow water to enter.